

By reading this article, you likely understand the significance of having a website with an SSL certificate. One key benefit of this is enhancing security by ensuring that data exchanged on your site cannot be intercepted by unauthorized parties, whether it’s for simple browsing or critical transactions like sharing sensitive information such as passwords and credit card details.
This article is for WordPress users who have WordPress installed and want to know how to set up SSL for full encryption using the HTTPS protocol. It may seem daunting at first, but the procedures are simple and easy to follow.
Discover how to set up SSL on WordPress by staying with us. 😉
Get an SSL certificate for your domain before you begin and install it.
If you do not have an SSL certificate installed on your domain, there are both free and paid options available. You can install them automatically or request installation from your hosting provider.
If you possess SSH access and root administrator privileges on your hosting, you might have the ability to independently set up the Let’s Encrypt certificate for free. Refer to the SSL Let’s Encrypt installation guide provided by the hosting for instructions.
After setting up the SSL certificate on your domain, it is recommended to make only the HTTPS version of your site accessible to visitors. This can be accomplished by configuring a redirect so that when a visitor accesses your site using an insecure URL (HTTP), they are automatically redirected to the secure version (HTTPS) almost instantly.
We will learn how to set up SSL in WordPress, fixing any mistakes and directing all users to secure URL versions.
Begin setting up SSL in WordPress through the admin panel.
The initial step in setting up SSL in WordPress is to make sure the admin panel operates using the secure version. This can be done by adding a code line to the wp-config.php file located at the root of your WordPress installation. To achieve this, access your WordPress hosting server and either download or edit the file using your hosting file manager.
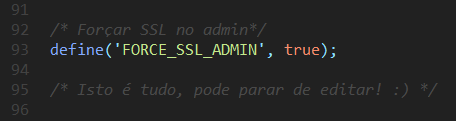
Open the wp-config.php file using your preferred code editor and find the section that says “That’s all, can stop editing” or “That’s all, stop editing.” Before this line, insert the code defines(‘FORCE_SSL_ADMIN’, true); as shown in the provided image.
Save the file, upload it to the hosting server, and then visit your WordPress login page. The page should redirect to the secure version, indicated by a green lock icon in the browser’s address bar.
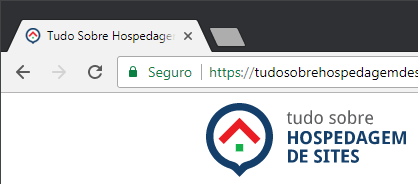
Log in with your username and password to enter the admin section. Note that a green padlock will be visible on every page of the admin panel.
Enable HTTPS on a single page.
It is advisable to temporarily enable SSL on one page to check for any errors before implementing it across the entire website, now that SSL has been configured in the admin panel.
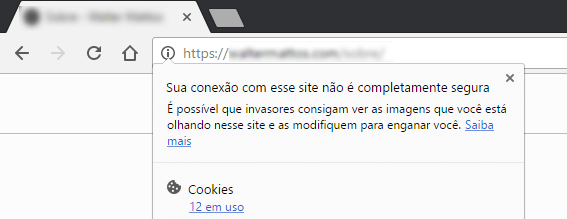
There are numerous plugins available that can redirect the entire website to SSL. However, at present, we do not wish to implement this as we first need to ensure that the site’s content is free of errors. These errors typically occur when certain page elements are loaded via HTTP URLs. Therefore, even if the page is securely loaded (e.g., https://site.com/page), displaying images, CSS, or scripts via non-HTTPS URLs (e.g., http://site.com/image.jpg) may trigger a warning for the user. Depending on the page’s content, the browser may even block these elements from loading, leading to a negative user experience.
Utilize the HTTPS WordPress plugin (SSL) for secure browsing.
Numerous plugins are available for setting up SSL on WordPress, but the HTTPS WordPress plugin stands out for its ability to enable SSL on individual pages. Despite not being updated recently, it remains compatible with the latest WordPress version (4.8).
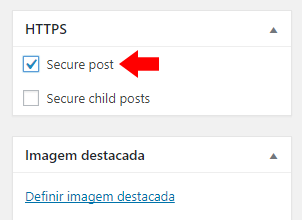
Install the plugin using your preferred method and activate it. A new option called “HTTPS” will be added to the WordPress side menu. Avoid adjusting any plugin settings for now. Instead, go to a page or post, especially one with images, and open the editor. Select the “Secure post” option in the sidebar and save the changes.
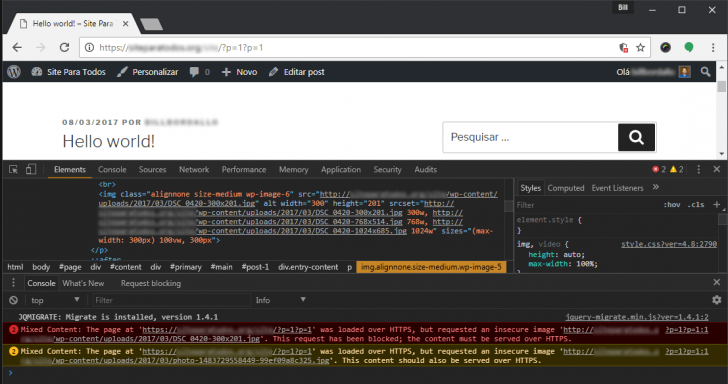
Access the browser page by clicking on the “visit page” link. If the browser lock is green, it means that all content is being loaded securely via HTTPS. If the green lock is not present, it suggests that some elements on the page are being loaded using an insecure HTTP URL. To troubleshoot this issue, inspect the page source code by right-clicking and choosing “inspect element,” or by pressing F12 on Windows. Look for any error icons, click on the warnings, and identify the elements causing the issue.
This process will provide you with a checklist of necessary updates for both your content and theme. If insecure URLs are found only in content (such as posts or pages), following these steps should address these issues.
Update the WordPress site’s URL to include HTTPS.
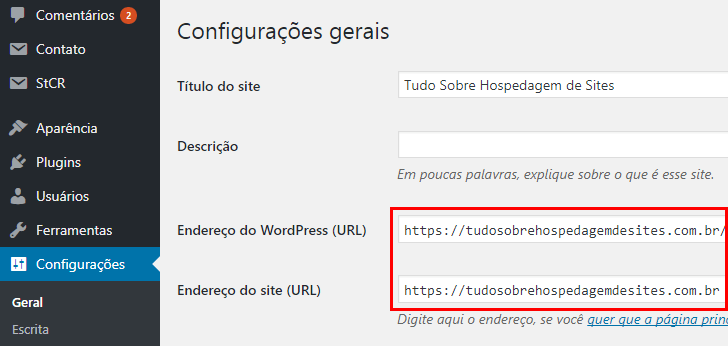
One of the WordPress settings keeps track of where WordPress is installed, while another stores the site’s base URL. This data is essential for generating URLs on your website pages, so it’s crucial for setting up SSL on WordPress and should be regularly revised.
In the WordPress Admin panel, navigate to Settings -> General and modify the WordPress Address (URL) and Site Address (URL) fields by adding “https://” to the start of the URL.
Save the page after making the update. You will then be taken to the login page. Log in and revisit the admin panel. From there, when you click on the “View site” link within the dashboard, you will be automatically directed to the HTTPS version of the homepage.
Update the URLs of images, CSS files, and scripts stored in the database.
Your website probably includes multiple images and scripts that are loaded insecurely because the default URL in the general WordPress settings is not HTTPS. To address this, we must search the database for these URLs and replace them with secure ones.
Experienced users have the option to directly make these replacements in the database. To simplify this process, we will utilize the highly beneficial Database Search and Replace Script in PHP tool, which does not require installation like WordPress plugins. Simply place it at the root of your WordPress installation.
Download the .zip file with the script, extract it, and place it in a folder within the main directory of your WordPress site. The folder can be named as desired.
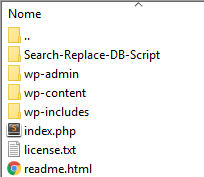
Upload the script folder to your hosting server and access it via your URL, such as mysite.com/Search-Replace-DB-Script.
The script replacement screen will appear. Enter your domain version with only http in the replace field. Then, input the same domain with https in the URL field.
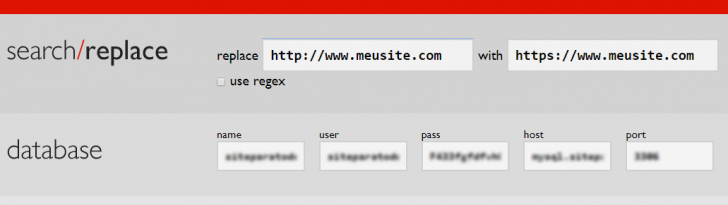
Click the live run button to initiate the replacement process. Confirm on the following screen and wait for the script to complete the procedure. Make sure to repeat the process for the www version of your domain (e.g., replacing http://site. with https://site.com) and for any other URL formats stored in the database (e.g., http://localhost).
After finishing the process, make sure to remove the script from your server as it includes access to your website’s database.
Scan the website for “mixed content”.
Your website should be reachable through both the old HTTP address and the new HTTPS address now. It is important to check your site for any insecurely loaded elements and correct them at this point.
To accomplish this, access your browser’s developer tools. In Google Chrome, you can find it in the menu under More tools -> Developer Tools. Open the HTTPS version of your website using the developer screen. Any errors will be shown in the top right corner of the screen. Click on the error count to view the list of issues at the bottom.
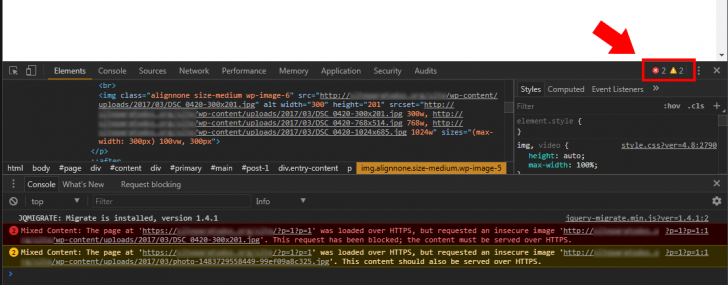
Loading errors known as “mixed content” occur when some elements are being loaded using a non-secure URL (HTTP).
These URLs are often added directly into the template source code within WordPress. This situation may also arise when utilizing external plugins, like those for social media, or when embedding external content such as videos through iframes.
You need to identify where these URLs come from and correct them by hand.
Set up an HTTP redirection to HTTPS.
To complete the SSL setup on WordPress, ensure that the server is redirected to allow visitors to access the secure (HTTPS) version of your site exclusively. This redirect is straightforward but needs careful handling.
If your hosting is on an Apache server, insert the following code into the .htaccess file located in the WordPress root directory. If the .htaccess file is not present, create an empty one.
If you utilize an NGINX server, the code will vary slightly.
In the example provided, make sure to substitute “mysite” with your domain.
If you’re unsure which server your WordPress site is using, reach out to your hosting provider’s technical support for assistance.
Remove the WordPress plugin for HTTPS (SSL).
After updating the WordPress URL, you can uninstall the HTTPS WordPress plugin as it is no longer needed after manual adjustments have been made.
To uninstall the plugin from the admin panel, navigate to the installed Plugins section, deactivate the plugin, click on Delete, and confirm the deletion process.
Inform Google when you change your URL for better SEO results.
If your website has been active for a while, it’s likely that various URLs are listed on search engines like Google. It’s crucial to notify Google about the change in your site’s default URL to maintain your search result rankings, especially for sites with significant organic traffic.
Generate two sitemaps: one for old URLs (HTTP) and one for new URLs (HTTPS). Consider using plugins like Yoast SEO for this task.
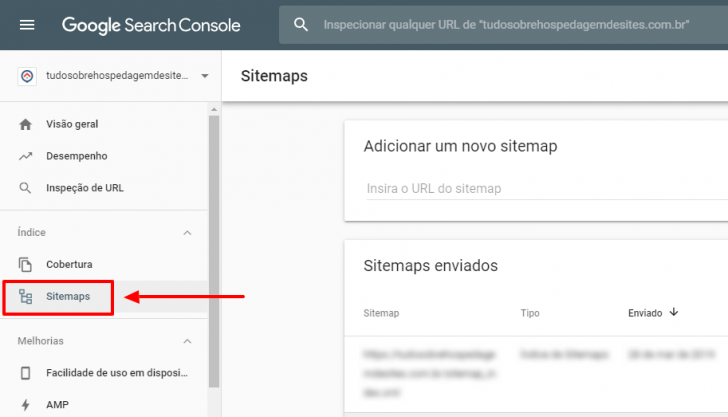
After completing the SSL setup in WordPress, you need to create a new property in Google Search Console. Make sure to specify the HTTPS version of your site’s URL (e.g., https://www.yoursite.com) when setting up the property, matching the domain as it is in the WordPress base URL.
After setting up the property in Search Console, go to Tracking -> Sitemaps and include the two sitemaps you created earlier. This step is crucial for Google to recognize the website as the same one, despite undergoing a URL modification.
To find out more about this process and view additional information about the update, refer to this Google support page.
Likes on the website may be excessive.
Social plugins on websites can monitor likes and shares directly on the site by using the page URL. However, if there are changes to the page URLs, the like/share count will be lost.
This will only happen on the website, so if your website links have been shared and liked on social media, the counts on those platforms will not be affected. This is quite useful, don’t you think?
Conclusion
Having a website with an SSL certificate is increasingly essential, not only for security reasons but also because Google considers SSL as a ranking factor for websites.
Setting up SSL on WordPress to ensure that it is completely secure is a straightforward process that can be done by anyone who administers a WordPress website.
If you encounter uncertainties while going through the process, feel free to comment, and I will assist you to the best of my abilities.
Published on 14/06/2017 and last updated on 30/03/2019.
Tutorials are labeled as tags.