
This article will delve deeper into the technical features of the platform, providing a step-by-step guide on basic configuration. If you are unfamiliar with the tool, it is advised to refer to the initial article on Jelastic Cloud, where the platform and its appropriate use cases are explained in detail.


I will demonstrate how to create a setup for running WordPress, but the process can be applied to any other application as well.
We will establish an Apache web server and a MySQL database server in this setting, as well as set up FTP, SSL certificate, and automatic scalability. Additionally, we will explore key features of the platform to aid professionals in managing their application infrastructure.
Creating the Surroundings
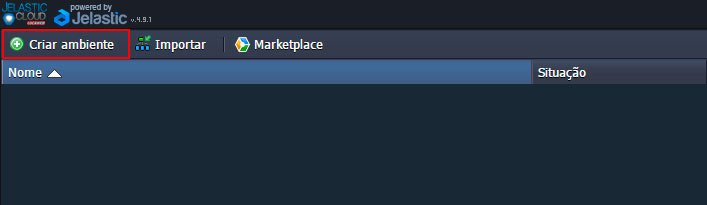
Click on the option to Create Environment.
It will display a window at the top showing the languages available for use. In this case, we will be using PHP.

Upon making a selection, we observe that the environment configuration window is split into three sections.
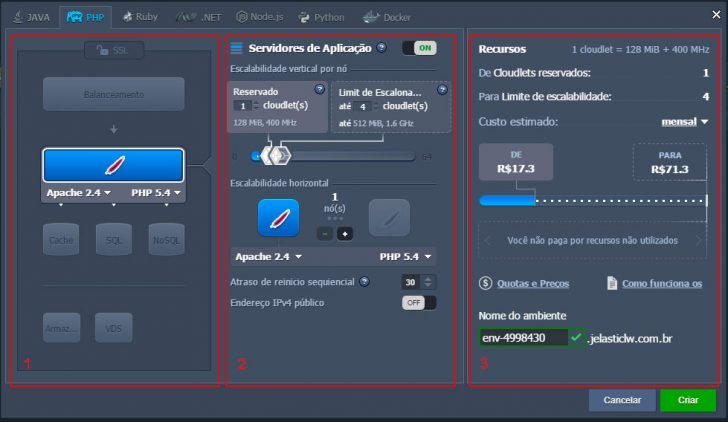
The first thing to note is that this is a network configuration in which you have the option to enable or disable various features such as load balancing, web server, database server, cache, storage, and VDS.
You can adjust your server’s scalability settings in the second step, including the number of cloudlets and nodes, and you can also assign an IPv4 public address to this feature.
The third section provides estimated charges for the environment on an hourly, daily, and monthly basis. This information is helpful for understanding potential costs. It is worth noting that these values are not set in stone and may vary based on factors like storage expenses, networking, and scalability. However, typically, the final monthly cost is close to the estimated values provided.
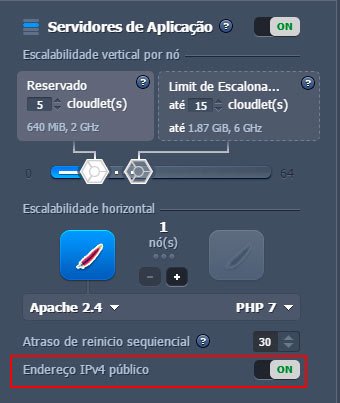
Web server
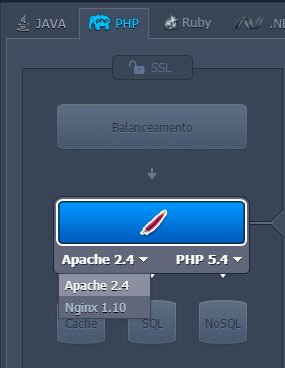
When using PHP, we can choose between two web servers: Apache and Nginx. In this case, we will opt for Apache.
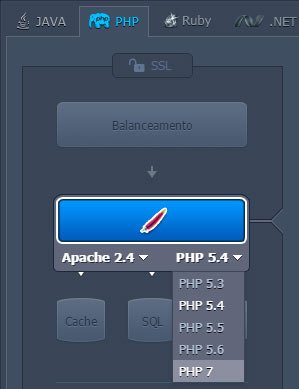
It also allows you to select the PHP version you want to install, and I will choose the latest one (PHP 7).
I will reserve 5 cloudlets for scalability options, with a maximum limit of 15 cloudlets for dynamic cloudlets. Horizontal scalability will not be considered at this time, with only one web server activation.
To utilize the public IPv4 address, you can enable this function to assign an IP to the Apache server in the environment. This allows you to link the domain to the server and set up its FTP. Please note that activating this feature is available only in the paid version of Jelastic, as the trial version does not support IPv4 activation.
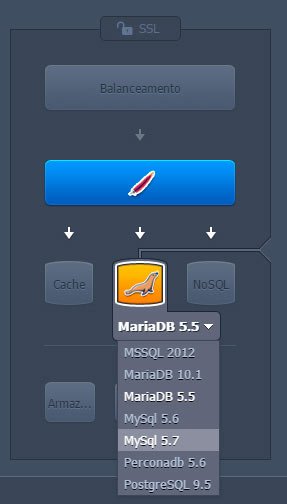
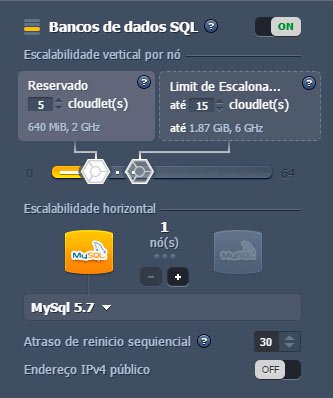
Database Server
Activating the SQL option provides a selection of relational database servers, such as MySQL 5.7.
We will keep the scalability settings the same as the web server, with 5 Reserved Cloudlets and 15 dynamic cloudlets, but using only 1 Node for now.
End
After configuring these initial settings, you can initiate the installation process by clicking on Create Environment in Jelastic. The installation typically completes in just a few minutes, after which you will receive two emails from the platform.
The initial notification confirms the successful installation, while the subsequent one indicates the addition of MySQL to your system. You will also be provided with details to access the database server.
- You can administer your MySQL server using phpMyAdmin at the specified address.
- Usernames and passwords are generated automatically.
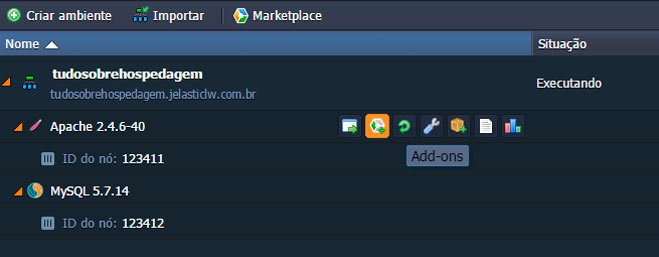
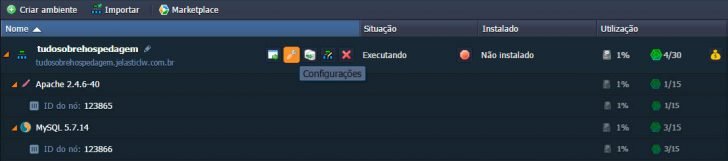
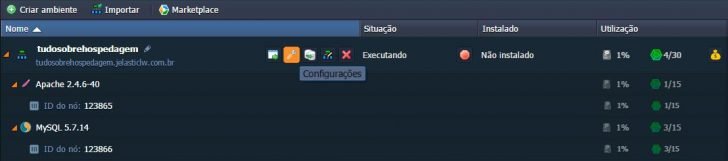
After the installation is finished, we can expand the setup and gather information about it.

According to the illustration provided.
- Role Servers List;
- Service installer options, server reboot, configurations, logs, and data analysis.
- Disk usage percentage.
- Cloudlets in operation.
We will look into each option more closely as we set up the environment. Currently, we are concentrating on this task. When you hover over the Apache Node, you will see a gear icon showing two IPs: the private IP and the public IP that was assigned when the environment was created.
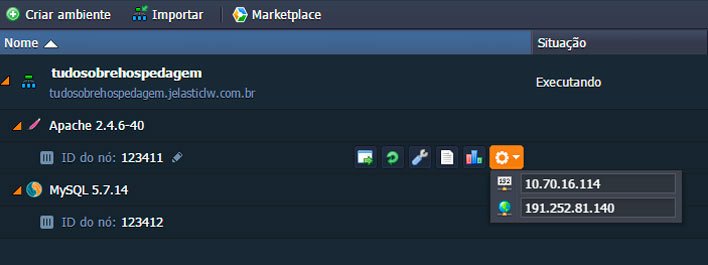
You will use this IP address to direct your domain to the set up environment.
Configuring Domain Settings
To direct your domain to Jelastic Cloud using a public IPv4 address, simply set up an A-type record with the provided IP and a CNAME entry pointing to your domain. Access your Registry.br dashboard, select the domain, and click on Edit Zone to complete the process.

Then, in the New Entrance.

chsyys/DepositPhotos
We will start by setting up entry type A with the IP address from the Jelastic environment, and then proceed to add the input.
chsyys/GettyImages

Click on “New entry” again, this time creating a CNAME entry. Input “www” in the first subdomain field and enter the domain name, such as “luizduarte.com.br,” in the Name field.
chsyys/PixaBay

Save these two entries and your domain will be directed to the Jelastic environment within a few hours, using only the Registry panel if your domain’s DNS servers are from the Registry. Otherwise, utilize the dashboard from where you purchased the domain or the specified DNS servers.
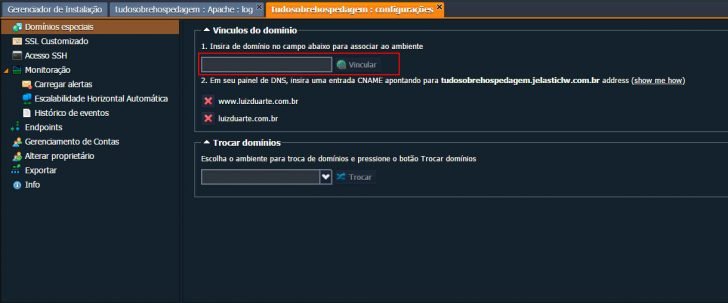
The next part of this setup involves adding your domain to the Jelastic Special Domains section to connect it with the environment you’ve set up. To do this, simply access the Settings within your environment.

In Special Domains, you can access a section where you can input the domains you want to add.
FTP setup
FTP configuration in Jelastic is easy to set up, including the Add-ons option next to the Apache line.
And opt to set up FTP.
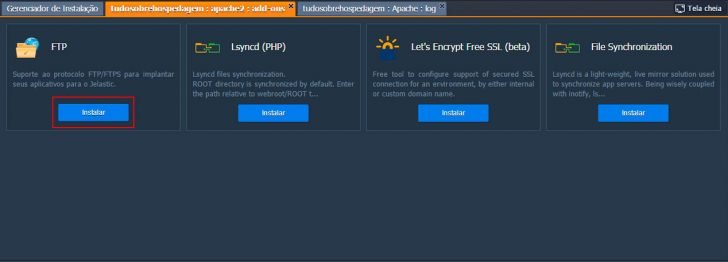
A window will appear with information about the FTP protocol and the installation requirements, such as the public IPv4 address. In our current setup, the public IPv4 address is already activated, so you can simply click on the install button.

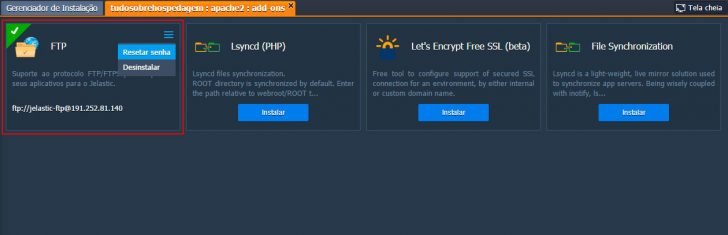
The installation process will start, and you will get an email containing FTP access details once it is completed.
- FTP Link (Address);
- Access;
- Automatically generated password.
- Public IP (IP previously set aside);
To change the FTP password, follow the installation path, go to the FTP menu on the right, and choose the Reset Password option to receive a new password via email.
Accessing and Controlling Databases
There are two ways to connect to the MySQL database in Jelastic: either locally or remotely.
Local entrance
We can focus on local access in this case because the current database server lacks a public IPv4 address and is not set up for remote access. Therefore, the only way to access and manage it will be through the email address provided during the environment installation process.
This URL leads to the phpMyAdmin page of the system. You can use the provided username and password to create and oversee databases.
Remote Access – Accessing a system or network from a different location.
Remote access to a database happens when it is possible to access the database from outside the server environment.
For instance, we can control access using a MySQL Client like Workbench or HeidiSQL on the desktop, via SSH, or by hosting the application on a server outside the Jelastic environment. This setup involves having the database server within Jelastic while the applications are on a separate server hosted elsewhere.
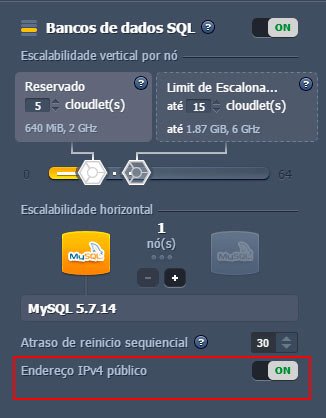
To access our database server in Jelastic remotely, we must activate public IPv4 just like how it was activated on the Web server.
To carry out this process, simply select Change the topology of the environment.

Click on MySQL, switch the public IPv4 Address key from OFF to ON, and then click apply.
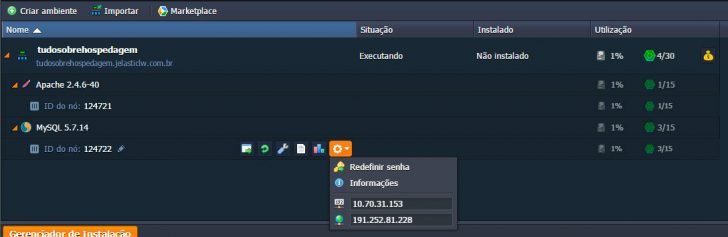
After successfully making the change, we can retrieve the IP address of the database server by clicking on the database node ID, similar to how we obtain the web server’s IP address.
You can remotely handle databases with this feature, which is optional for running the application. If the application is hosted on a web server in the same database environment, you have the option to store an IPv4 and manage the database through phpMyAdmin, a browser, or email address post installation.
Modify password for server database
Changing the database password can be tedious, especially when the application is already running in production. This is due to the need to update the password in the application’s connection file, causing downtime until the change is completed.
We understand that we may forget our password or need to change it for other reasons. To reset it, simply click on the MySQL server and follow the instructions to change the password.
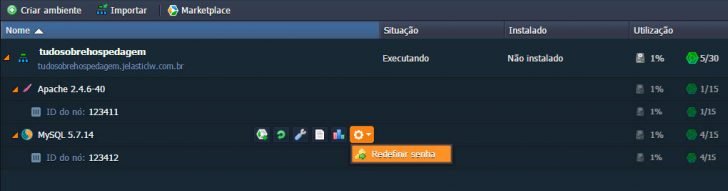
A confirmation window will appear to verify the modification. The password will be updated and then sent to the email on file.
Installing SSL technology
An SSL certificate is crucial for protecting user data, boosting site visibility in search results, and more. These are compelling reasons to have an SSL certificate on your website.
Several companies offer digital certificates for those who do not already possess one. In Jelastic Cloud, you can set up your certificate in the following manner.
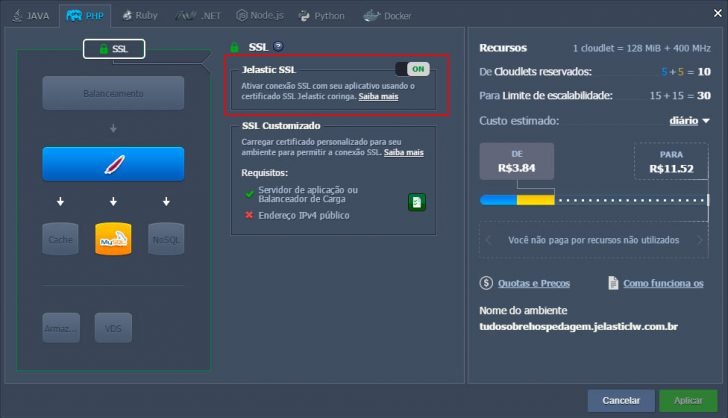
Jelastic SSL
Jelastic offers a complimentary certificate that is simple to set up, but it is mainly beneficial for test environments where a custom domain or active public IPv4 is not in use.
Click the Change Environment Topology button to activate this certificate.

Click on SSL at the top of the topology.
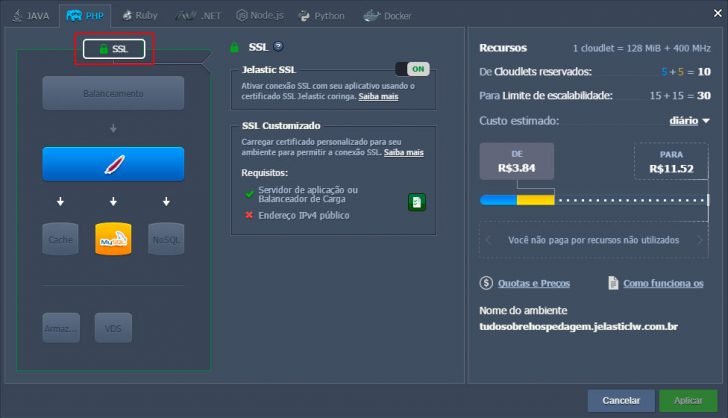
Simply enable Jelastic SSL after completing this.
Customized SSL
The custom SSL is the SSL certificate bought from a certified company of your choosing. To set up this certificate in Jelastic, simply go to the Settings of your environment.
In SSL Customized, this occurs.
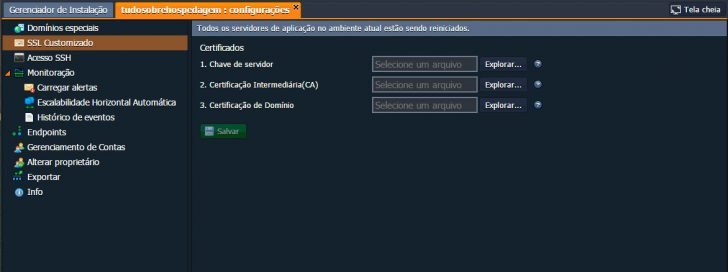
You must submit three files: Server Key, Intermediate Certification (CA), and Domain Certification. These files are provided with the SSL certificate you selected after purchase.
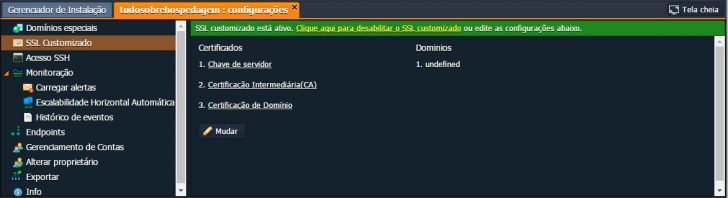
After sending the 3 files, simply select Save to initiate the installation process. Upon completion, a green bar will be displayed above for certificate management.
chsyys/UnPlash
Let’s Encrypt SSL
Let’s Encrypt, available in Jelastic’s Add-ons, allows you to secure your site with SSL encryption for free and easily generate a certificate for your domain with just a few clicks.
Before installing this certificate, it is crucial to ensure that the domain is directed to your Jelastic environment using CNAME or A Record, and linked to your environment through special domains in the environment settings. This validation process is necessary for Let’s Encrypt to confirm the authority of the domain, preventing potential fraud. Make sure that IPv4 is enabled in your web environment.
One can initiate the installation process of the SSL Let’s Encrypt certificate by focusing on the domain associated with the environment.
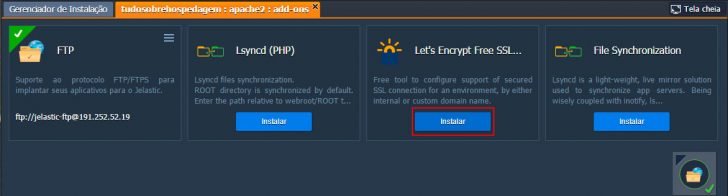
To begin the installation of Let’s Encrypt, select Add-ons located above Apache.

Install Let’s Encrypt Free SSL.
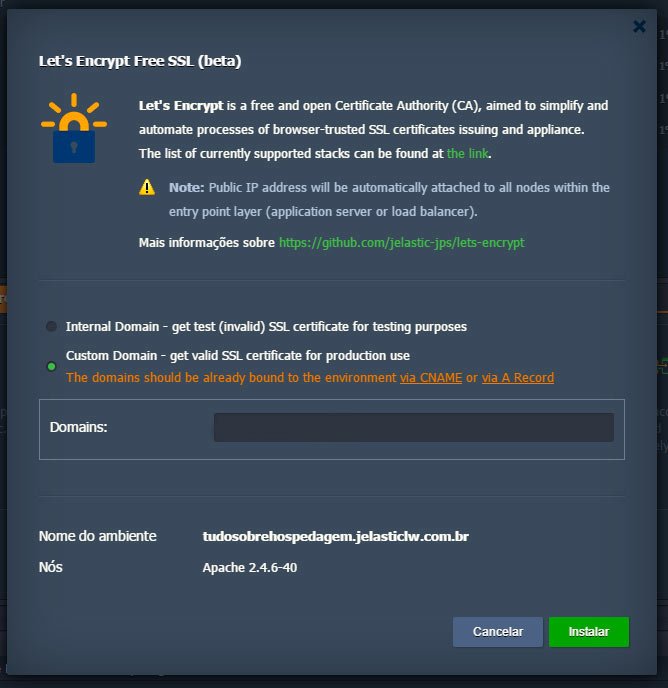
You will need to select your preferred installation method from a popup window.
The internal domain is the host subdomain that is named after your environment and ends with .jelasticlw.com.br (for Locaweb users) or .jelastic.websolute.net.br (for Websolute users).
Domain you purchased from a hosting provider or directly from RegistryBR.
chsyys/ShutterStock
We will proceed with the setup of Custom Domain. Enter all the domains or subdomains you wish to use with the SSL certificate in the Domains section, separated by spaces.
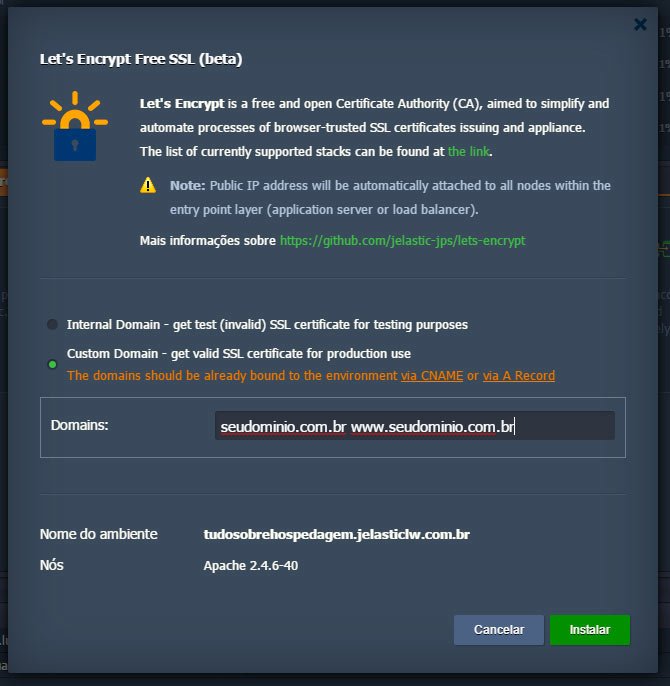
Fill in the field and then select Install. The installation process may require a few minutes as it is not a quick task, despite being straightforward.
Upon completion of the installation, a message will pop up confirming the successful installation and indicating that the certificate is valid for only 90 days. You will also receive an email reminder about the certificate renewal 15 days before it expires.
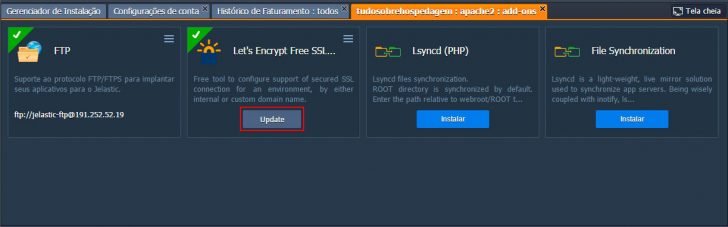
To renew the SSL certificate, you need to access the Jelastic panel, go to Add-ons like when you installed it, and then click on update.
After the installation or update is finished, you can verify the correct installation of the certificate and its expiration date in the environment settings.
Click on Settings.

After customizing SSL.
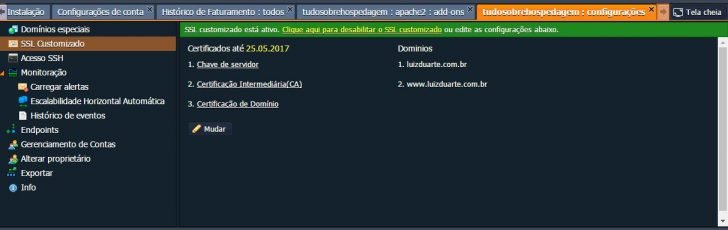
You can find details about the certificate’s configuration and expiry date on this screen, which is set to expire on 25/05/2017.
Horizontal Staircase that operates automatically
In the initial Jelastic article, it was mentioned that horizontal scaling involves replicating the pre-set machines. Jelastic allows for smart and automated scaling. Users can set up the environment to maintain a specific resource utilization level. If a particular feature fails to meet its utilization target, another machine will be activated to handle the excess requests.
To set up this function, select Settings within the system.
Click on Automatic Horizontal Scalability afterwards.
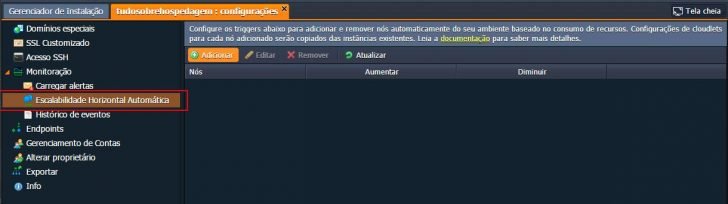
Clicking on the Add button will open the panel for creating scalability rules.

Listed in the top bar are all the currently active servers or resources in the environment. In this instance, only Apache and MySQL are displayed. The configuration process will focus on Apache, but it applies identically to all other resources.
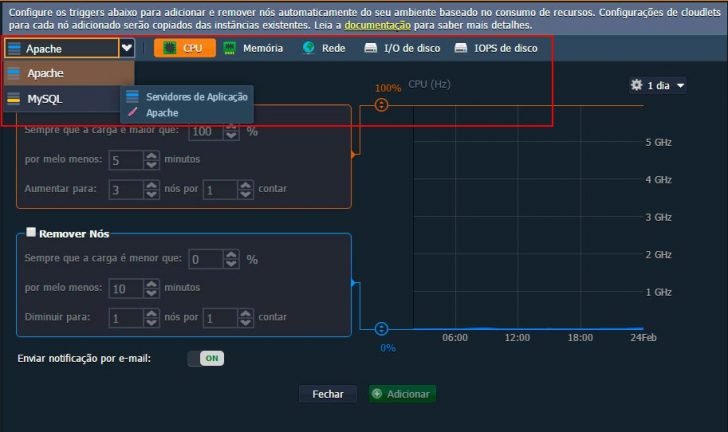
We can create rules for each individual feature in the upper bar, such as CPU, Memory, Network, Disk I/O, and Disk IOPS, ensuring redundancy and reliability in the environment.
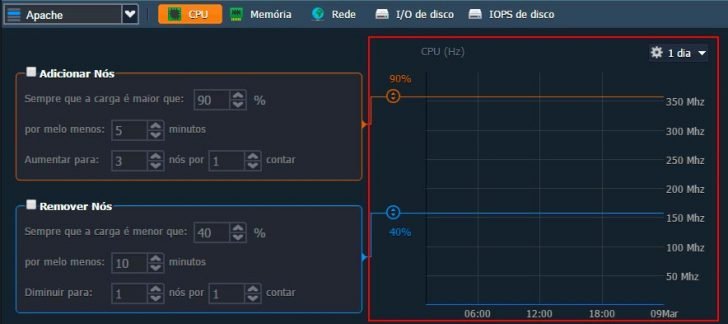
In the rest of the panel, there are two graphics that can be turned on or off. The percentage bar allows you to adjust the usage level of a feature, adding or removing it from your environment.
The Orange Bar can be moved from a minimum of 20% to a maximum of 100%.
Drag the blue bar to adjust the removal percentage from 0% to 100%.
I will establish a guideline for Apache processing to prevent the server from reaching 100% processing capacity, which can lead to issues such as slow performance and potential crashes. If the processing level hits 90%, we will add a Node.
We can remove the Node once its processing drops below 40%, following peak access.
You can fine-tune the rule in the fields on the left side.
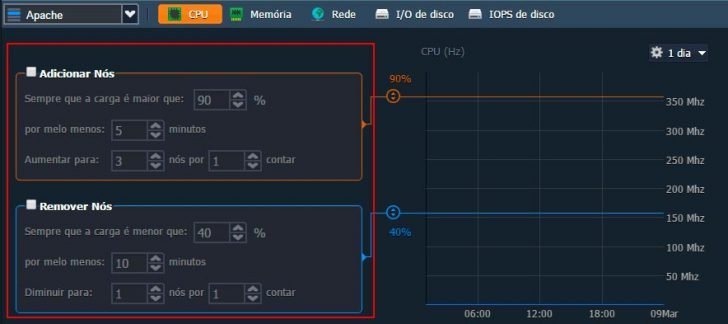
Configures the percentage value of processing, memory usage, or other features before making any additions or removals when the load exceeds a certain threshold.
The server must maintain the preset limit for a certain period before the rule is executed. If the Apache server’s processing time exceeds 90% for more than 5 minutes, it will trigger the additional rule.
The limits for adding nodes will be increased if processing reaches 90% even with one additional node. Up to the configured limit, one more node will be added in such cases. For example, if the limit is set at 5 nodes and all 5 are active while Apache server processing remains above 90%, no new node will be added.
The rule can be set to activate a specified number of instances whenever it is valid, rather than increasing just one instance at a time when the Apache server processing reaches 90%.
Whenever the server processing load exceeds 90% for a minimum of 5 minutes, one additional node will be added, up to a maximum of three nodes at a time. If the load remains over 90% for more than 5 minutes, no more nodes will be added.
The guideline for untying knots is as follows: if the load is below 40% for a minimum of 10 minutes, reduce by 1 unit for each count. Consequently, the procedure will eliminate 1 unit at a time if the operation falls below 40%.
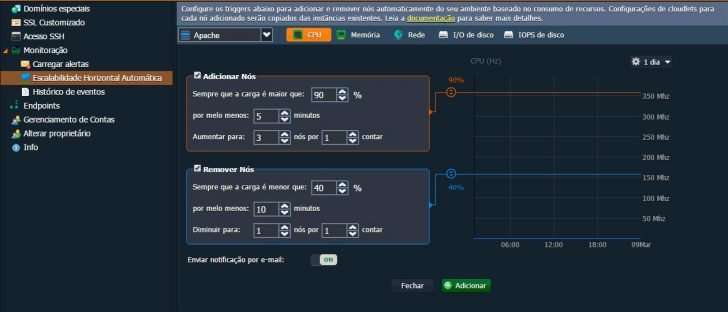
I suggest keeping the option for sending email notifications enabled. This way, you will receive an email notification whenever a rule is executed, informing you about the addition or removal of a No from your environment.
After configuring all settings, you can select ‘add’ using the processing rule you set up. You can also create additional rules for the same server with different characteristics if needed.
Statistics – the study of data interpretation and collection.
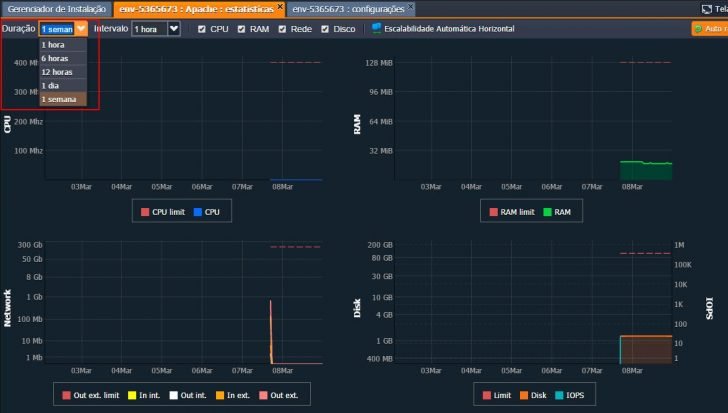
In the Jelastic Cloud statistics section, you can track server resource usage like CPU, RAM, storage, and network. Monitoring these metrics is crucial to understanding the environment’s performance and ensuring adequate resource allocation. This enables us to make necessary adjustments, avoid unnecessary costs, and prevent resource shortages that could impact our application.
To view the usage statistics of our application, we can access the Statistics feature located above the Apache or MySQL environment, or directly click on the specific Job we wish to monitor in environments with multiple users.

In the scenario, there are 2 Apache nodes and 4 MySQL nodes in the environment. Selecting a specific node will display statistics only for that node. Clicking on the Apache or MySQL environment will show statistics for all nodes in that environment. For example, selecting Apache will display statistics for both Apache nodes, while selecting MySQL will show statistics for all 4 MySQL nodes.
You have the option to customize how the statistics are displayed and when they are updated, and you can view a week’s worth of history.
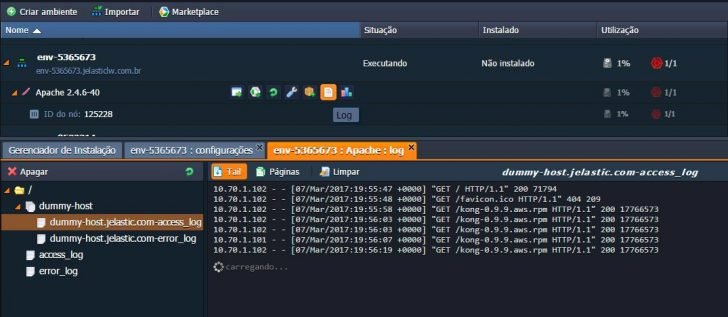
Logs recorded on a system
In the logs, we find valuable information, particularly when customers report slow site speed or site outages.
When a customer reports issues with an application such as errors, slow performance, or inaccessibility, it is important to conduct a thorough investigation, especially if the problem is no longer present or worsens periodically.
We can use logs to monitor for resource overload and detect potential threats like DDoS attacks by identifying unusual IP addresses in the access logs.
To access this report, simply click on Logs located above your Apache environment. All log files, including access_log, error_log, ssl-access, and ssl-error, will be displayed on the screen.
In conclusion
In this article, we cover the practical aspects of setting up and configuring an environment in Jelastic. This includes configuring an Apache server, a MySQL database, linking a domain to the instance, setting up FTP access, installing an SSL certificate, managing application scaling, and viewing usage statistics and logs.
Jelastic Cloud offers numerous features, settings, and important details that cannot all be listed in one article. However, the information provided allows you to set up and oversee a basic, scalable, and dependable environment for WordPress.

Published on 14/03/2017 and revised on 20/04/2018.
Tutorials are identified by tags.