

chsyys/FreeImages
You chose KingHost for its affordable website hosting with attractive features, including the complimentary SSL Let’s Encrypt certificate provided in all hosting plans.
This article provides a comprehensive guide on installing a Let’s Encrypt SSL certificate on KingHost. It emphasizes the significance of applying this procedure to all domain variations and explains the benefits of having a website display the secure version with SSL to all visitors.
Stay with us and discover! 🙂
Let’s Encrypt is a service that provides free SSL certificates.
Before heading to the actual procedure, we will provide a brief overview of what Let’s Encrypt is and its benefits.
Let’s Encrypt is a certification authority that provides free and automated SSL certificates with the aim of enhancing internet security and is endorsed by major companies like Google, Facebook, and Automattic, the creator of WordPress.
It was officially introduced in 2016 and rapidly embraced by over 20 million websites worldwide. This was particularly beneficial following Google’s announcement that SSL is now a ranking factor for websites, leading to the expectation that soon most websites will have SSL.
Installing Let’s Encrypt on KingHost
To begin the process, you need to log in to your KingHost accommodation’s control panel.
It is important to note that the domain must be active on the hosting for the process to function correctly. If you have registered the domain elsewhere, update the DNS settings and wait for the propagation period before initiating the Let’s Encrypt installation on KingHost.
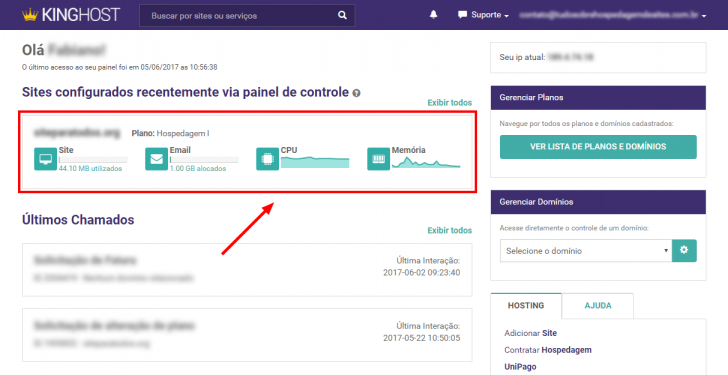
Access the control panel for hosting is the first step.
The panel can be reached through the KingHost website or by directly visiting the URL panel at Kinghost.com.br. Your login and password details were emailed to you when you activated the plan.
Upon entering the control panel with your login credentials, you can view the dashboard homepage that provides an overview of your subscribed services. For instance, the Hosting I plan details are displayed prominently for quick access to its management section by clicking on the summary.
Go to the SSL certificate management section.
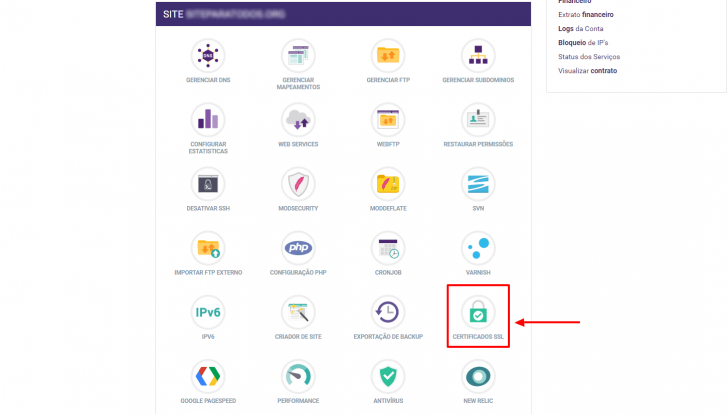
Upon accessing the resource section of your hosting plan, you will find a resource usage report at the top of the page. Below that, there is a section containing various icons labeled with the title “Website mydomain.com.br”.
Scroll down the page to find the SSL Certificates icon, where we will set up Let’s Encrypt on KingHost.
chsyys/FreePik
Choose the domain you want and proceed with installing the certificate.
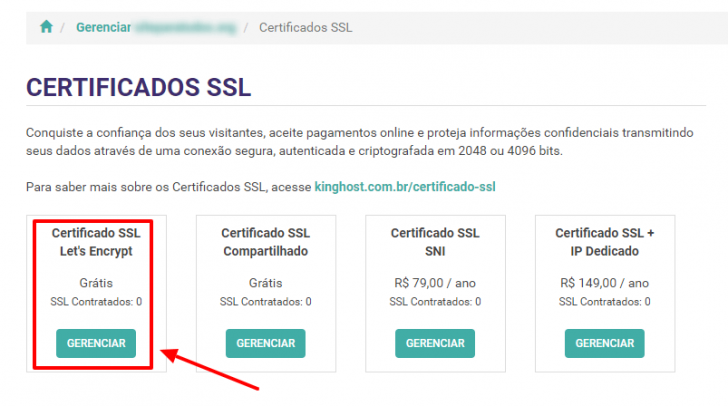
In the certificate section, there are four options for installation on your website. Let’s Encrypt and Shared certificates are free, while SSL SNI and dedicated SSL + IP certificates can be purchased separately. The key distinction lies in the technology used, with SNI not needing a dedicated IP.
Click the initial choice to reach the installation section when transitioning from Let’s Encrypt.
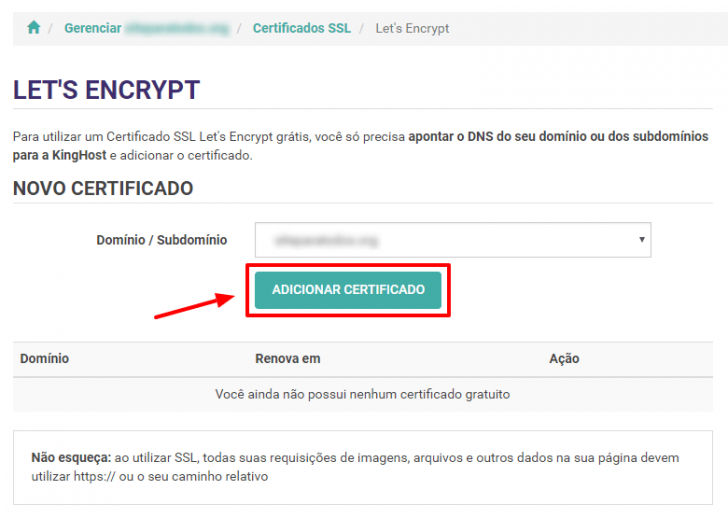
Install Let’s Encrypt on versions that include and exclude www.
We need to specify the desired domain for Let’s Encrypt installation on the next screen. Remember, a separate certificate must be issued for each domain or subdomain. Therefore, it is crucial to install SSL for all versions of your domain, including those with and without www.
Select the domain from the checkbox and then click on Add certificate to complete the installation.
Repeat the process for each version of your domain and as many domains as you need, until you have installed Let’s Encrypt. The process is automated and free, so enjoy! 😉
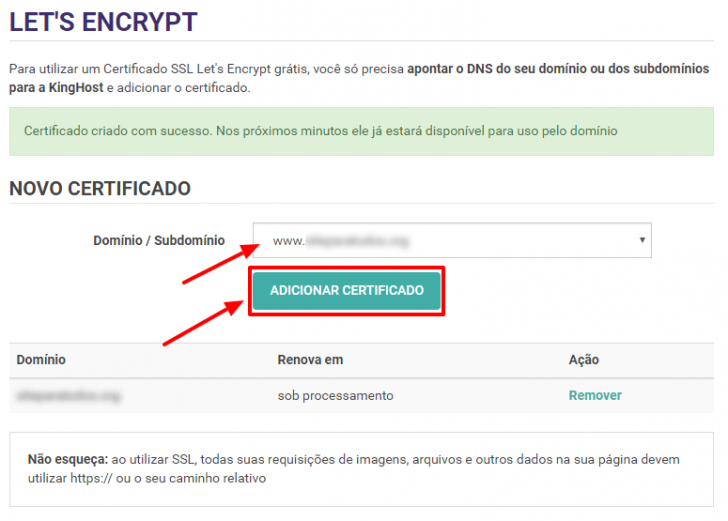
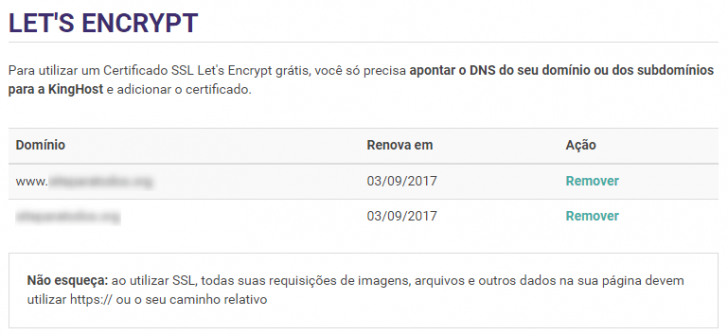
After installing each certificate, the domain will show an “under processing” message. Wait briefly and refresh the page. Soon, the status will update to display the certificate’s renewal date, which is valid for 3 months. The automatic renewal process will take care of this, so there is no need for manual intervention.
chsyys/Burst
Verify that the certificate is operational by accessing your domain.
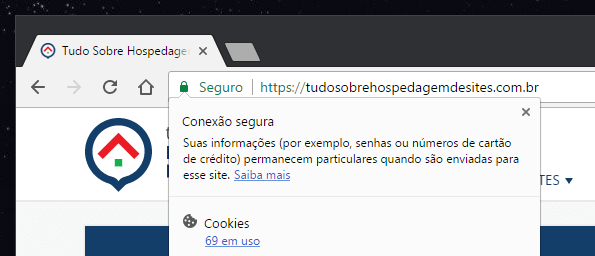
After installing the certificate through the panel, it was time to test the live installation by entering your domain address in the browser with the https protocol.
https://meusite.with.br
If everything is working properly, a green lock will be displayed in the browser’s address bar, as shown in the image.
Issues that may arise following SSL certificate installation
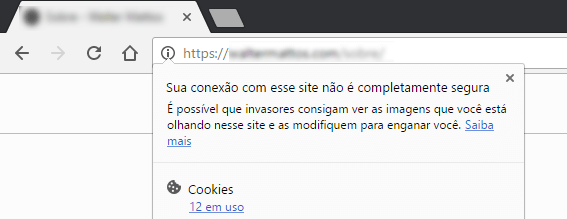
If a warning icon or a different symbol is shown instead of a green lock, it could indicate that not all elements are being loaded securely on your website. Adjust the code to ensure that all page elements are loaded using a secure connection.
chsyys/ShutterStock
The SSL certificate installation was done correctly, but the website’s source code requires modifications.
If the certificate is not installed, the page will not load and will instead show a warning message.
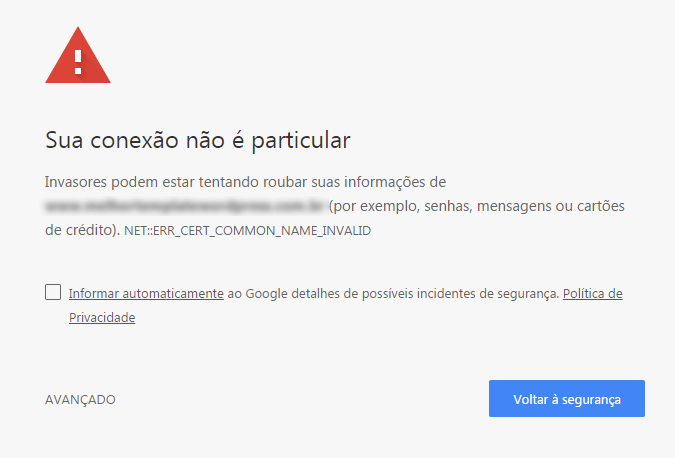
If you see a message like that on your website after setting up Let’s Encrypt, double-check the installation process to ensure it was done correctly. Contact KingHost support if needed to verify the installation.
How to access the SSL certificate installed on any website
You can check the SSL certificate of any website to see details like the issuer, issue date, and validity period. This information is publicly accessible and can be viewed using any browser, although we will demonstrate with Chrome in this case.
Open the Google Chrome browser and go to the developer tools by either pressing F12 or navigating to the Chrome menu (three dots) -> More Tools -> Developer Tools.
Click on the Security tab in the open window and select View certificate to view the SSL certificate shown in the image.
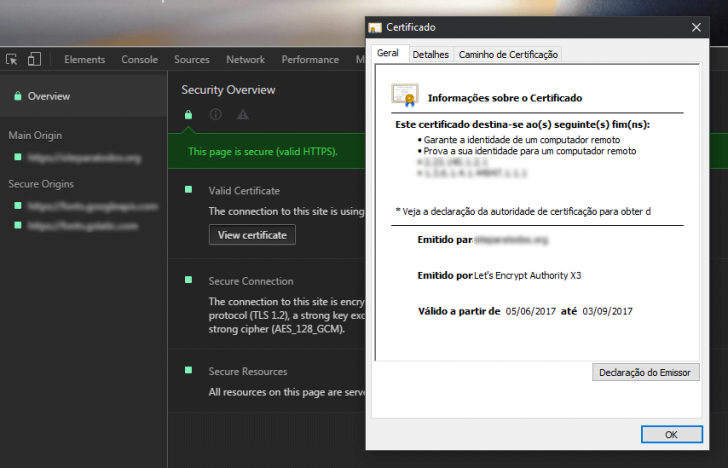
If there is an issue with the SSL certificate, it will be displayed on this screen as well.
Let’s Encrypt post-installation configurations
Configure your website after installation to display only the secure version. Users accessing the unsafe version will be automatically redirected to the secure version. Various methods exist for this redirection, which may vary based on your site’s technology.
To see unloaded features on your website via SSL, go to www.whynopadlock.com and enter a page URL from your site with https. The tool will display the list of unloaded features, highlighting those requiring URL adjustments.

It will be simpler to identify necessary adjustments for your website with this report. Another option for obtaining a report on insecure elements loaded on a page is through the Google Chrome console, which is accessible in the developer’s tools.
In conclusion
This article provides instructions for setting up an SSL Let’s Encrypt certificate on KingHost. The certificate installation and renewal process is automated within the hosting control panel.
An SSL certificate is essential for websites in today’s online environment, and Let’s Encrypt has made obtaining one simple and affordable through company support.
Do you have any inquiries? Feel free to comment if you wish to contribute more information to the article. Let’s discuss! 🙂
Published on 06/06/2017 and revised on 20/04/2018
KingHost tutorials tags.