

The article addresses a recurring request from readers regarding WordPress migration without changing the domain. Following an earlier tutorial on this topic, the blog has received numerous inquiries seeking guidance on the specific process of changing the WordPress installation URL. Hence, a separate tutorial is being created to address this need.
When migrating WordPress to a new domain, it’s essential to alter the database due to how WordPress stores the installation URL. This involves replacing the old URL with the new one in the database, which is a straightforward process outlined in the article.
Who should read this article
The instructions and information provided here are applicable in various scenarios, with the primary one being:
- Developers who are working on a WordPress site locally may wish to transfer it to a hosting platform upon completion.
- To replicate WordPress on a different server/computer.
- When moving WordPress hosting, the domain will be altered for those migrating.
If you find yourself in any of the situations mentioned above, stay with us as we will explore how to transfer WordPress with a domain change!
Compare options and select the top WordPress hosting service if you’re unsure where to host your WordPress site.
Prior to commencing the migration process from WordPress
Ensure you have all the necessary tools and access before beginning the procedures outlined below. Required items include:
- Access to the WordPress installation files is provided, which encompasses all content located at the base of the installation, such as the /wp-admin, /wp-includes, and /wp-content directories.
- Accessing the database of the original WordPress installation is necessary in order to export it, and this can be done through PHPMyAdmin, command line, or an external database manager like MySQL Workbench.
- Access to the new hosting server is available for migrating files.
- Accessing the new server’s database is similar to accessing the original database, as it can be done through PHPMyAdmin, command line, or any external manager.
There are alternative methods for migrating WordPress, like utilizing plugins to export the database. This method involves conducting the export from within the WordPress admin panel instead of directly from the database. Nonetheless, the following procedure is considered more reliable and less susceptible to issues during the export and import of the database.
Initiating the WordPress Migration
Now that we have confirmed that we have obtained all the required permissions, we will commence the migration.
WordPress File Backup – Backing up files in WordPress
Whether you are using WordPress on your computer or a hosting server, it is important to backup all files for migration to a new hosting.
Backing up on a local environment (localhost)
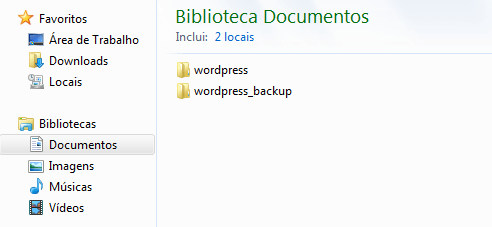
WordPress can be set up on a personal computer using a local server program like XAMPP or EasyPHP. If you plan to move WordPress to a new hosting, it is advisable to create a backup of the root directory to ensure any necessary file edits can be made without affecting the original setup.
Backing up data on a server hosting platform.
If the WordPress you wish to transfer is hosted on a server, you must also duplicate all the WordPress files.
You may want to access your hosting’s control panel to create a backup. Many hosting providers offer a feature that allows you to manage and modify server files. Alternatively, you can use an FTP program for a more efficient backup method.
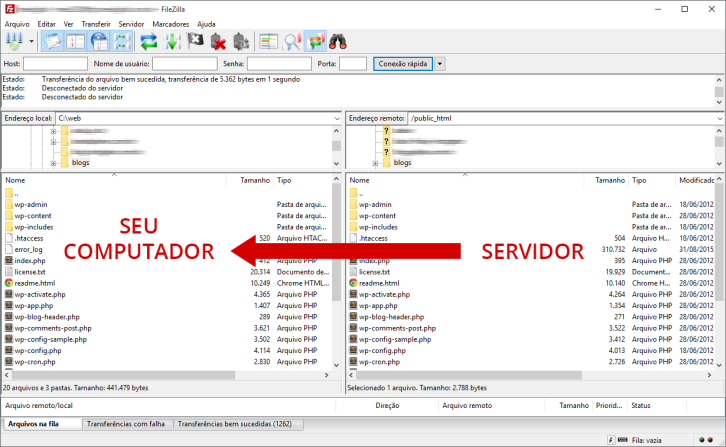
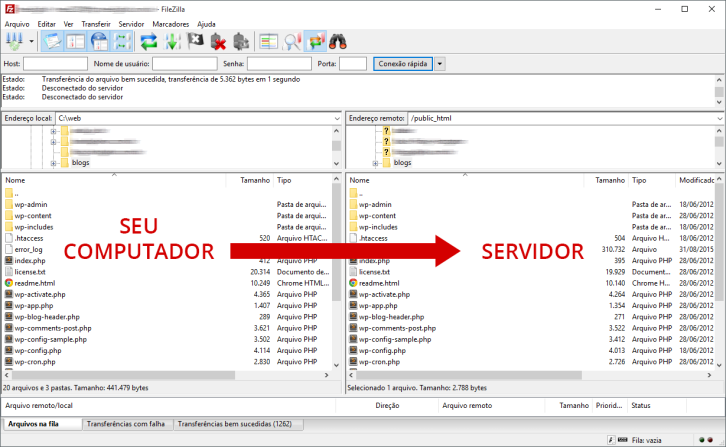
Access your server via an FTP program like FileZilla to transfer all files from the WordPress installation, including those in the root directory, wp-admin, wp-includes, and wp-content folders. Backup the server to your computer through the FTP program connected to your hosting.
After the files finish downloading, we will proceed to the next step of exporting the database.
Database export – Exporting a database
The WordPress database export should create a .sql file that includes both database content and instructions for recreating the database structure upon import. MySQL can use this file to understand the tables to create and the data to insert.
There are various methods to export a database, all of which require basic credentials (username and password). One common approach is utilizing a database manager, which can be either external (a program on your computer) or internal (hosting server’s own manager). PHPMyAdmin is a popular choice among hosting providers, enabling database management through a web browser without the need for additional software installation. Other export options involve SSH access and external managers.
We will explore exporting through PHPMyAdmin in this article, as it is widely used and accessible in local environments like XAMPP or EasyPHP.
Go to PHPMyAdmin and find your WordPress database name in the side menu.
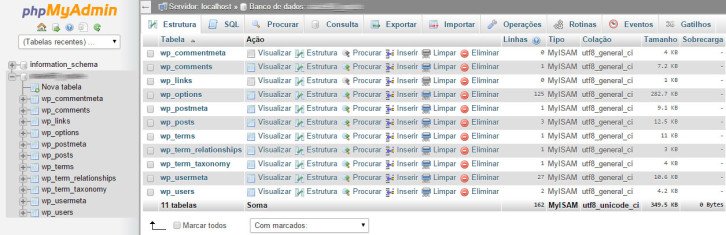
Navigate to the Export tab located at the top of the screen after selecting it. Opt for fast export mode and select the SQL format.
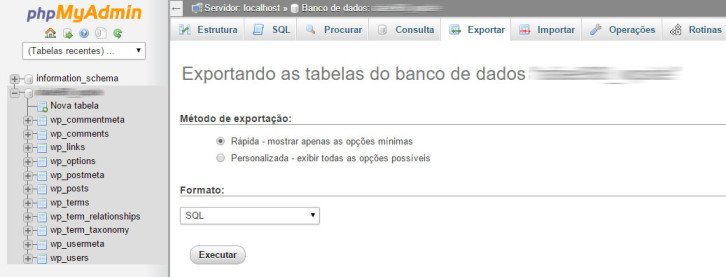
Click on the Run icon and store the .sql document on your device.
If you have successfully maintained our presence here, you possess all the necessary requirements to proceed to the subsequent stage, involving transferring WordPress to your new server, be it local or remote.
Creating the fresh database
Create a new empty database where you plan to migrate your WordPress. Import the database previously exported into this new database. The .sql file exported earlier will be used to create all the tables according to the provided instructions and structure.
When migrating WordPress to a new hosting provider, access the control panel of the hosting and set up the database. Keep a record of the database access credentials as they are crucial for a successful migration. Important information to have includes:
- The host name to be used in your application can either be localhost or mysql.umdominioany.com.br. Verify with your hosting provider which host name will be utilized. Typically, this information is provided when setting up the database.
- The bank’s name can typically be chosen or partially specified when setting up the database.
- The user named (user name) has access to the database.
- Bank access password – Password for accessing the bank.
When moving WordPress to a local setup, it’s important to set up the database the same way and keep track of the login details. With popular tools like XAMPP and EasyPHP, you can create the database directly through PHPMyAdmin.
#4 – Importing Data into a Database
After completing the previous step, you will have an empty database ready for importing. Different methods can be used for this task, with advanced users often opting for terminal commands while PHPMyAdmin provides a more user-friendly interface. Other options include using tools like MySQL Workbench or FrontMySQL for database imports. In this illustration, PHPMyAdmin will be utilized.
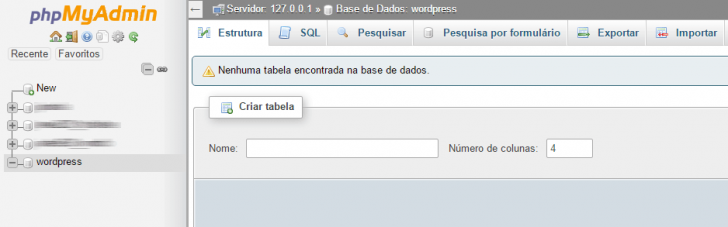
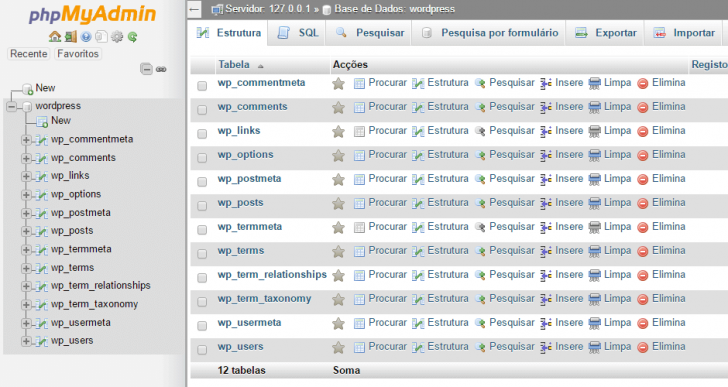
Access PHPMyAdmin on your new hosting and select the bank you previously created. The bank should be devoid of tables and empty.
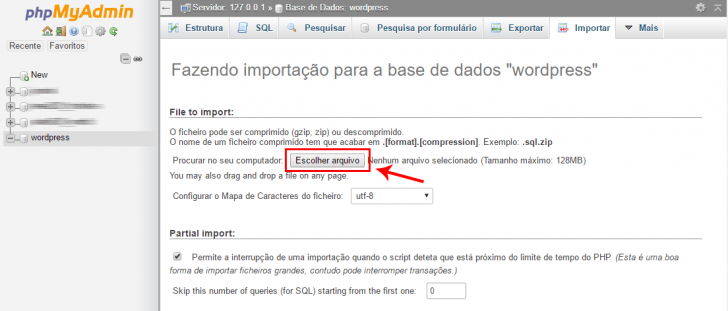
Click on the Import option in the top tabs and choose the .sql file with the original database export.
If the import was successful, you can see your WordPress tables in the Structure tab.
chsyys/StockVault
If the base was imported successfully, we can move on to the next step.
Depending on the size of your database and your hosting settings, errors may arise during the import process. These issues are typically associated with database size or character encoding. If the problem is due to the database size, reach out to your hosting provider to request an increase in the import limit specified in the PHP configuration file (php.ini). If you’re unsure about this, your hosting support team will be able to assist you. In the case of encoding issues, you may need to export the database again, opting for the Custom setting and selecting the correct encoding type, usually UTF-8.
If you are unable to import the database, try looking up the error code on Google for assistance, or feel free to comment here for support. 🙂
Modifying the setup file
Before transferring WordPress to a new location, make sure to modify the wp-config.php file, as it links WordPress to the database. Adjust the access credentials in this file to ensure WordPress functions correctly in the new hosting environment.
The wp-config.php file is located in the main directory of the WordPress setup. To access the backup created in step 1, find and open this file with a simple text editor like Notepad or a preferred code editor like Sublime Text, Atom, Dreamweaver, or Notepad++.
Locate the lines in the file that refer to connecting to the database and input the new bank’s access credentials.
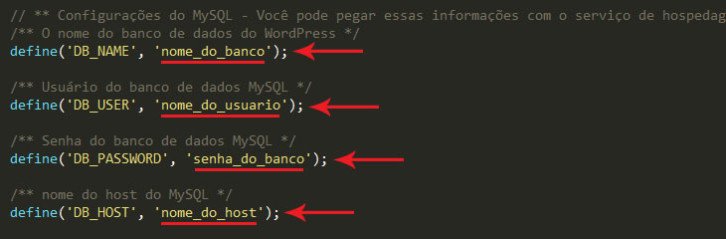
After making changes, remember to save the document.
Importing files is the focus of Text #6.
After updating the WordPress configuration file, transfer the backup, which also includes the new configuration file, to the new WordPress hosting. For local server migration, place the files in the WordPress installation folder. For new hosting migration, upload the files using your preferred method, such as an FTP program.
Files need to be transferred to the destination directory for WordPress installation. If you prefer WordPress to be located at the domain’s root, shift the files to the public folder’s root within your hosting, typically shown as /user_x/public_html/.
After uploading files, refrain from accessing WordPress immediately. This is necessary because the database stores old URLs. To ensure the site functions properly, the old URL must be replaced with the new one in the database before proceeding to the final step.
Change the URL of the WordPress installation.
This final step is crucial when transferring WordPress to a new domain. After completing the necessary steps, attempting to access WordPress with the new domain may result in a 404 error page. This occurs because the installation URL is stored in the database, and various elements of the theme rely on this information to load essential WordPress components like style sheets, scripts, and website pages.
There are different methods available to replace the WordPress installation URL in the database. One approach involves executing a find and replace query for more experienced users. However, there are simpler and more user-friendly methods to perform this update. This article demonstrates using a PHP script that facilitates replacing the installation URL across all database tables through a browser-accessible interface, providing visibility on the number and locations of replacements.
Database Search and Replace Script
The Database Search and Replace script was created by Interconnect/it, a UK-based company, and is available for free download. Simply download the script, unzip the content, and move the Search-Replace-DB-master directory to the root of your new WordPress installation. It is advised by the Interconnect/it team to rename this folder for added security, as the script has access to and can modify your database. After completing these steps, your WordPress installation root should have this structure.
/script-search-and-replace-renamed/wp-admin/wp-content/wp-includes
The next action involves opening the URL with the script in the browser. If you relocated WordPress to the main domain folder, the URL will be http://mywordpresssite.com/script-search-and-replace/. If it’s in a different directory, adjust the URL accordingly, like http://mywordpresssite.com/wordpress/script-search-and-replace/.
You will be presented with a screen similar to this.
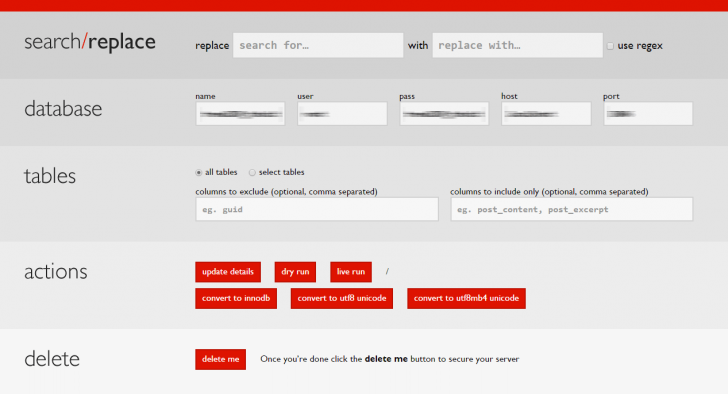
The database fields should be filled with the information from the wp-config.php file automatically. This includes the database access details, which the script recognizes and uses for database edits.
You need to input the previous WordPress installation URL in the replace field, such as http://localhost/wordpress. Then enter the new WordPress installation URL in the corresponding field, like http://mysite.com.
To ensure accuracy and preview modifications prior to making them, you can select the dry run option. This feature scans your database and indicates the planned changes.
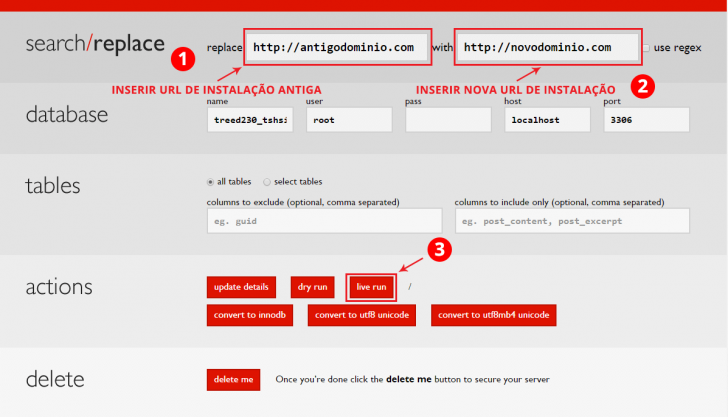
Click the live run button after verifying the filled information to initiate the operation. A confirmation pop-up will then appear on the screen; proceed by clicking OK.
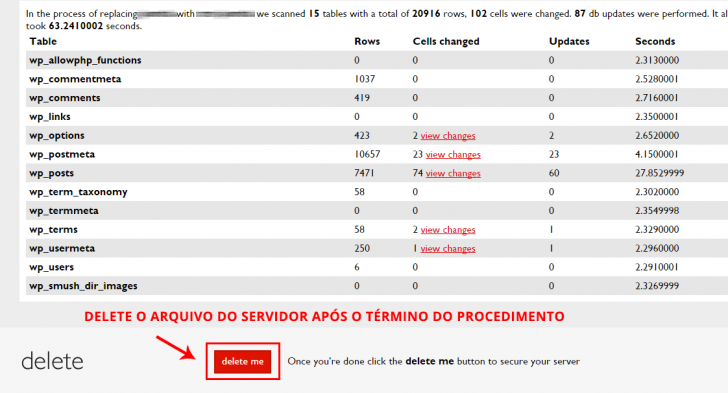
Update the domain in the database.
After completing the process, you will be able to view all modifications made in the database on the screen. In case of any inadvertent substitutions, it is necessary to re-import the database and redo the search and replace procedure.
Access the updated web address of your WordPress site.
After finishing the process, you can reach WordPress using your new URL (for example, mysitewordpress.com.br). The website will appear the same as it did on the previous server, just with a different URL.
This process may not address every potential situation, and there is a possibility of encountering variations from the explanation provided. If any issues arise, it is recommended to review the steps and procedures to determine the potential cause. Additionally, consider checking the comments below as other readers may have encountered a similar issue. 😉
In conclusion
WordPress is a robust content management system that is portable and can be utilized for tasks such as moving a locally developed site or creating a duplicate for testing and development.
The WordPress installation process may vary depending on the hosting server, so it is important to carefully follow each step and check for any missing details.
Leave a comment if you have any questions or challenges, and we will be happy to assist you!
Published on 06/04/2017 with the latest update on 22/06/2020.
Keywords: Guides, WordPress