
When discussing website hosting, it is essential to consider the technical aspects involved, particularly the management of website files. While you can edit website files on your computer, they eventually need to be transferred to the hosting server for access.


There are various methods to connect to a hosting server, such as utilizing the hosting file manager, an FTP program, or SSH access through a terminal. These options range in difficulty, with the hosting file manager being the easiest, followed by the FTP program, and SSH access being the most complex and primarily used by professionals in the field.
If you are interested in learning about the effective tool SSH, stay with us until the conclusion of this article. Discover what SSH is, its benefits, how to connect to your hosting using this technique, and explore various possibilities it offers.
What is SSH – An explanation of SSH
SSH stands for Secure Shell, a protocol that enables secure internet connections to remote servers through authentication and encryption, ensuring data privacy even if intercepted.
The SSH communication protocol is found on all professional hosting servers and is commonly used by companies and professionals. The benefits of this protocol in terms of security and efficiency in task execution will be discussed.
Reasons to Utilize SSH
SSH has advantages over other server access methods and can be essential in certain situations.
Safety
The main reason for utilizing SSH is its emphasis on security. Communication between computers is encrypted, making it difficult for unauthorized parties to interpret. An illustration of SSH’s security feature is provided below:
An invasion technique known as man in the middle involves a third-party computer intercepting data exchange between your computer and the server, allowing for unauthorized access to and manipulation of transmitted content. This method can be exploited for malicious activities, such as capturing online banking transactions. In less severe instances, it may be used by internet networks to inject advertisements on non-SSL encrypted websites. Utilizing the SSH protocol can help prevent such invasions.
Application deployment
The SSH protocol is commonly utilized for connecting deployment services, particularly in projects utilizing version control like Git. This enables communication between the repository and the production server, allowing developers to push changes to the site or application online.
Ability to complete tasks quickly
SSH’s advantage lies in its flexibility for task execution. This flexibility is not inherent in the protocol but in the command-line access it provides. Users can execute numerous commands on a server through the shell protocol, simulating direct server operation.
Accessing your hosting via SSH: A step-by-step guide
To utilize the protocol, an SSH client is required. This program facilitates the access. In Linux or Mac operating systems, the command terminal, which comes pre-installed, serves as an SSH client. For Windows computers, users need to install it themselves.
Putty is a well-known SSH client for Windows, but you can also use other options like Git Bash, which comes with the installation of Git for Windows. Once you have Git for Windows installed, you can access the terminal and utilize SSH.
Microsoft is developing a built-in SSH client for Windows 10 devices, which is currently in beta but expected to be officially integrated in the near future.
Enable SSH on your hosting account
SSH access is often deactivated by default in hosting providers. Before attempting to connect, check if this is the situation. You can typically enable SSH access through the hosting control panel. If not, contact your hosting’s technical support to request activation.
With SSH enabled, you have the ability to connect to your hosting server utilizing one of the following approaches.
Method 1 involves utilizing a login and password.
You can access the hosting server by using the server address (which can be a domain or IP) along with the login details and access password, typically provided in the hosting plan activation. FTP credentials are usually sufficient for this purpose.
Open the terminal with the SSH client and enter this command to establish the connection.
If you favor using IP rather than the domain, enter:
Remember to substitute the user and mysite fields with your own login credentials at com.br/189.168.25.89.
After entering the command, press “Enter”. If the username and server address are accurate, the specified message will display on the terminal.
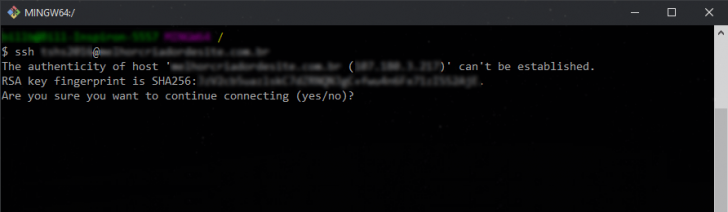
This notification will only show up once upon the initial visit. It states that the address’s authenticity could not be verified and inquires if you wish to proceed. To proceed, you must type “yes” in the terminal and press “Enter.”
The terminal will ask for the access password. Enter it without it showing on the screen, as this is typical behavior for password entry. Alternatively, you can paste the password. Press “Enter” after inputting the password to access the server.
After gaining access, the username and server name will be displayed preceding the “$” symbol. To list the directories and files on the server, enter the “ls” command and press enter. The output will be similar to the image provided.

The public_html/ directory in the file list shown should be utilized for publishing your website or any other file intended for public access.
Using a combination of a public and private key pair is the second method.
There is a more secure method of connecting to the server through a public and private key pair. The keys consist of two text fragments with paired characters that are used for decrypting data, operating like a lock and key system.
The public key is kept on the server, while the private key is stored on the user’s computer. Access to the server requires passing an encryption test using both keys. Successful decryption grants access without the need for a login or password, making this method more secure as only the user possesses the private key.
Your public key can be added to other servers, allowing you to access multiple servers without needing to create a new key for each one.
Creating a pair of keys, one public and one private.
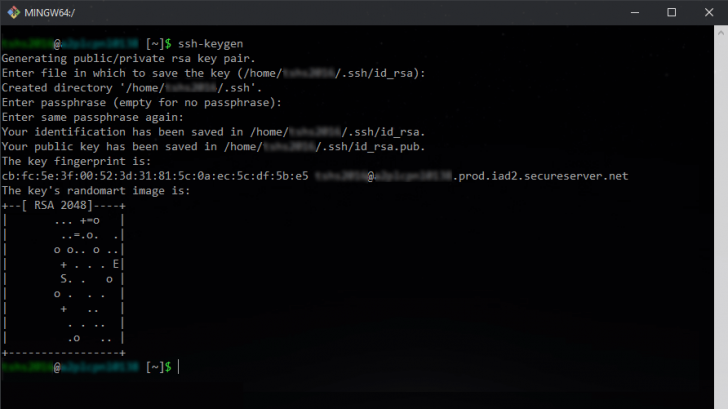
You have several options for creating SSH keys. One way is to utilize the ssh-keygen command within the terminal. Upon using this command, you will be prompted to specify a filename for your private key. Typically, the default name is id_rsa, and it will be stored in a hidden directory called .ssh at the root of your user directory. Simply press “Enter” to accept this default configuration.
When generating a private key, you can choose to create an encryption password to enhance security. This password will be required for the key to be useful, even if stolen. If you prefer not to leave your private key unprotected, you can input a password during the process. Additionally, the terminal will display the key pair’s location and a random image, which serves as a visual representation of the key’s generation but can be disregarded in practice.
If everything goes according to plan, the terminal will show a screen similar to the example provided.
Placing the public key onto the server.
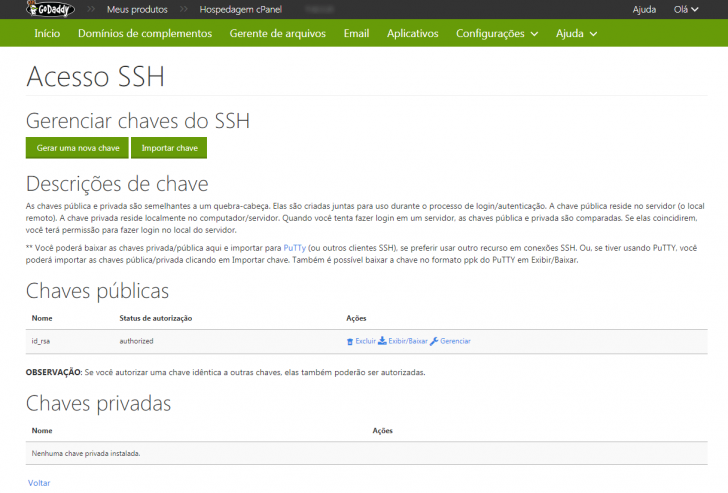
After creating the key pair, you must add your public key to the server. The process may vary depending on the company, and for lodgings using the cPanel control panel, there is a specific section for managing SSH keys.
To add your key using cPanel, go to the dashboard and find the SSH management section in the GoDaddy hosting cPanel.
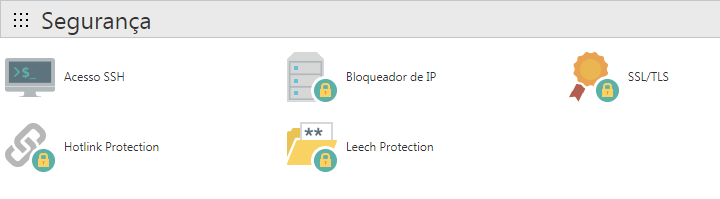
Click on the “SSH Access” icon, then click “Enable”. Next, select the “Manage SSH keys” option.
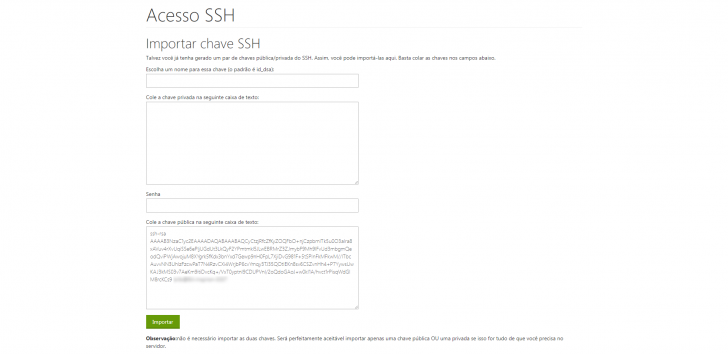
Click “Import key” on the management screen, enter “id_rsa” as the name, open the id_rsa.pub file located in ~/.ssh/id_rsa folder, copy the content into the “public keyword” field, and finalize the key import without filling out the private key and password fields.
If everything proceeds as expected, you will be able to access SSH next time without needing to input the password in the command line. Depending on the hosting service, you might have to approve the sent key, a process that can also be carried out through cPanel.
If your hosting service does not have cPanel, consult your documentation or contact support to find out how to input your public key on the server for SSH access.
Creating a configuration file
Creating a config file in SSH with server credentials allows for easier connection without repeatedly entering username and server address.
To generate the configuration file, go to the .ssh folder on your device, make a new file named config (without any extension). Then, open this file using a text editor or notepad and input the provided details.
Replace “server” with any desired name for use in the SSH command. Use “my site.com.br” as the configured domain or server IP address. Replace the “user” field with the username for accessing the server. Port 22 is commonly used for this type of access, although some companies may opt for port 2222. Contact your hosting provider for further clarification if needed.
Save the configuration file with this information in the ~/.ssh/config directory. You can then connect to the server via SSH using the ssh server command with the specified Host name.
What tasks can be performed on a server using SSH?
SSH is just the protocol that allows server access, so the SSH command is used to grant access. Once logged in, users can execute commands permitted to their user account.
If you are a root user, you have full control over hosting, such as system reboots and services. Standard users, with less autonomy, can still use strong commands to manage their sites.
We won’t provide a detailed explanation of how to utilize a Linux terminal on a server. Nonetheless, we can highlight some actions that can be executed directly on the server via SSH access. These include:
- Manage files by creating, removing, and modifying them.
- Create and remove directories.
- Directories and files can be copied, moved, and renamed.
- Back up files and databases.
- Transfer documents from one server to another.
Conclusion
We discussed the significance of utilizing SSH in hosting, as well as how to set up access and execute actions on the server through this protocol. Despite appearing daunting initially, configuring it initially is straightforward.
This type of knowledge is essential for individuals aiming to professionalize and learning programming as well as creating websites and applications online.
Any inquiries? Feel free to leave a comment, and we will be happy to discuss.
Publication date: 30/06/2017 (revised on 20/04/2018)
Concepts are identified using tags.